OFF-ROAD DRIVINGIN TEXAS.
Texas terrain has specific characteristics that make it different from what you see on Moab videos. The difference between a good day and a very expensive day is not the rig — it's the driver. This guide covers universal technique and the specific demands of wheeling Southeast Texas, the Hill Country, and every terrain type within driving distance of Houston.
The Decisions That Determine Everything
The decisions you make before your tires hit the trail determine everything that follows. Two habits separate experienced wheelers from people who are learning lessons the hard way.
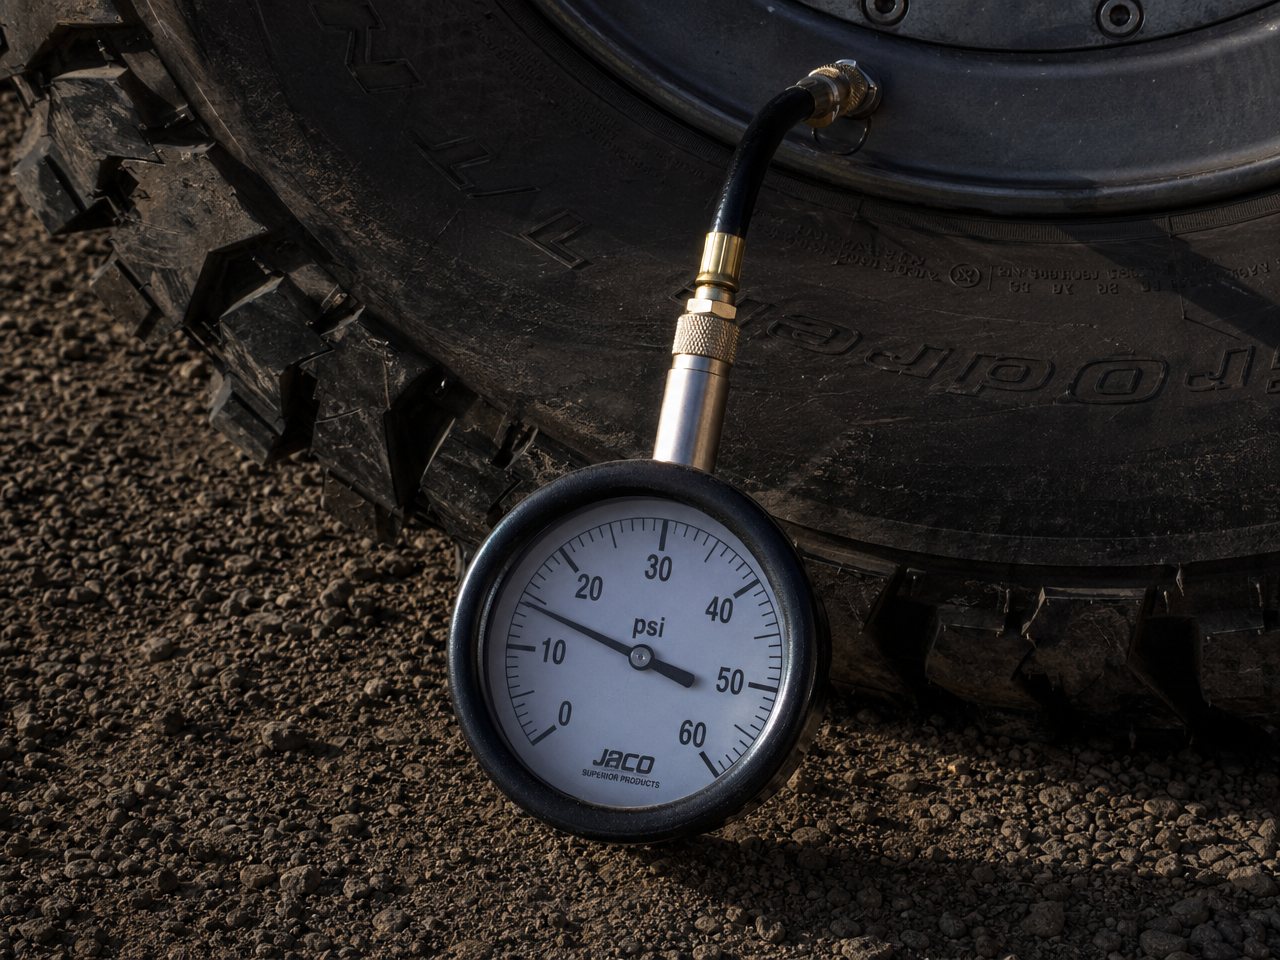
Air Down Before You Start
This is the single most impactful thing you can do before wheeling any terrain — and the most commonly skipped step by new enthusiasts. Airing down increases your tire's contact patch, allows the tire to conform around rocks and roots rather than bouncing off them, and cushions the ride in a way that protects your suspension components from repeated impacts that cause premature wear.
Target Pressures by Terrain
| Terrain | Target PSI |
|---|---|
| Gravel and maintained forest roads | 20–25 PSI |
| Moderate dirt trails | 15–20 PSI |
| Deep mud — Southeast Texas black gumbo | 12–15 PSI |
| Rock crawling | 8–12 PSI |
| Extreme rock crawling on granite (Katemcy) | 6–10 PSI |
You must air back up before returning to pavement. A tire at 10 PSI on a highway generates heat that destroys the tire and creates a blowout risk. This is why onboard air is not a luxury — it is a required part of a complete trail setup. A CO2 tank runs out. A quality compressor does not.
Know your minimum safe pressure before you go. Most quality mud terrain tires on a standard rim handle 8 PSI without bead separation risk. If you're running beadlocks your floor is lower.
Know Your Outs Before You Commit
Before your tires are on any obstacle — rock, hill, water crossing, mud pit — locate three things:
- 1
The line you intend to drive. Where exactly are your tires going, from entry to exit.
- 2
The bypass if the line doesn't work. Where do you go if you lose momentum, lose traction, or the obstacle is worse than it looked.
- 3
The recovery point if you need to be pulled. What is rated, accessible, and in the right position before you commit.
What looks passable from the driver's seat often reveals critical information on foot — depth, firmness, hidden obstacles, the actual grade of a hill that looks flat from a distance. Walk any obstacle that is unfamiliar.
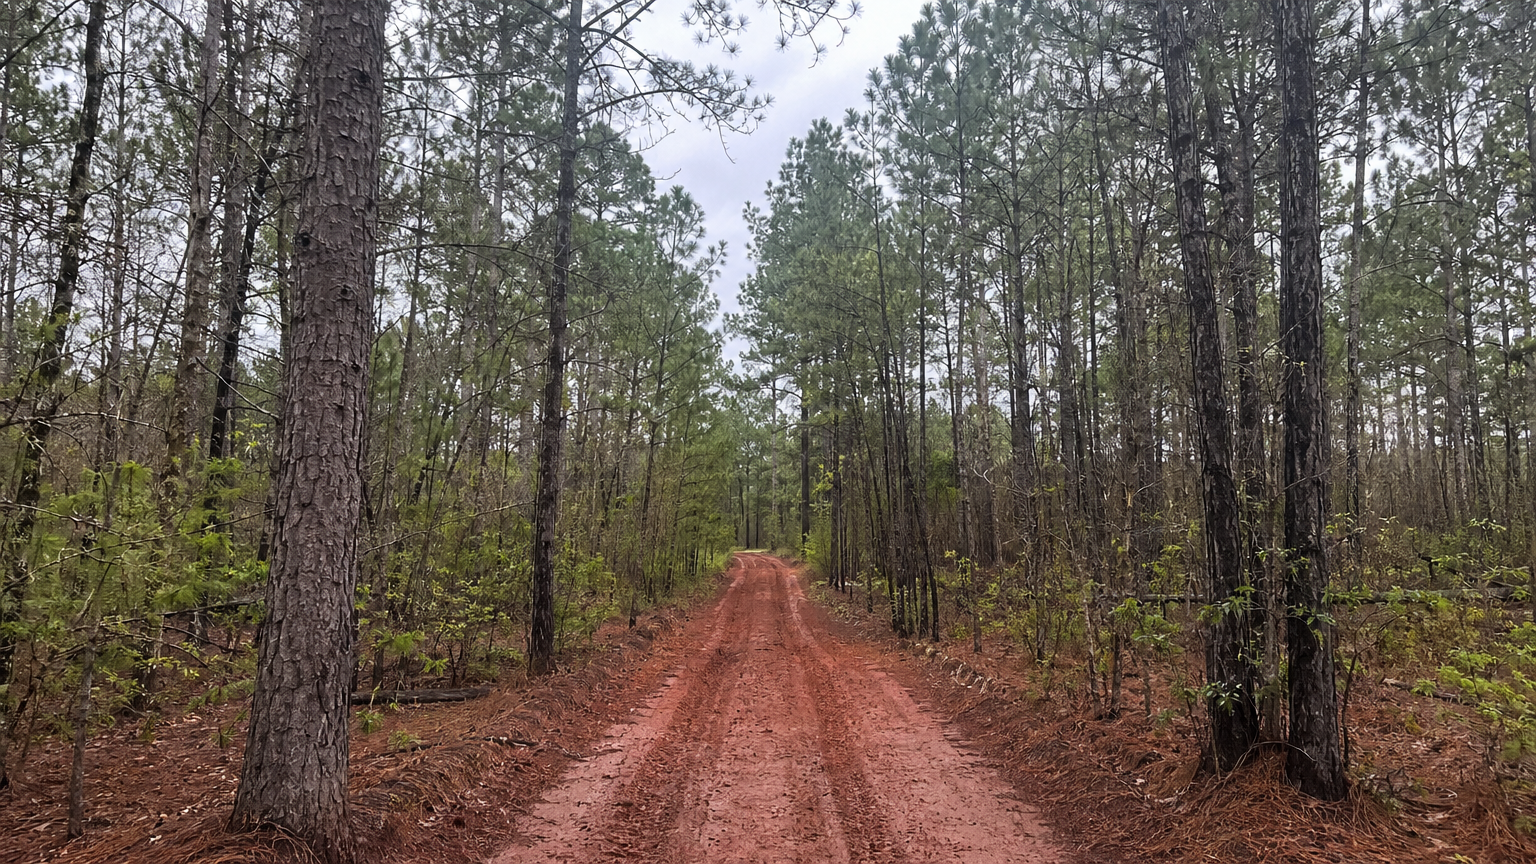
Different Terrain, Different Technique
Texas has several distinct terrain types within a few hours of Houston. Each one requires a different approach. Getting this wrong is expensive.
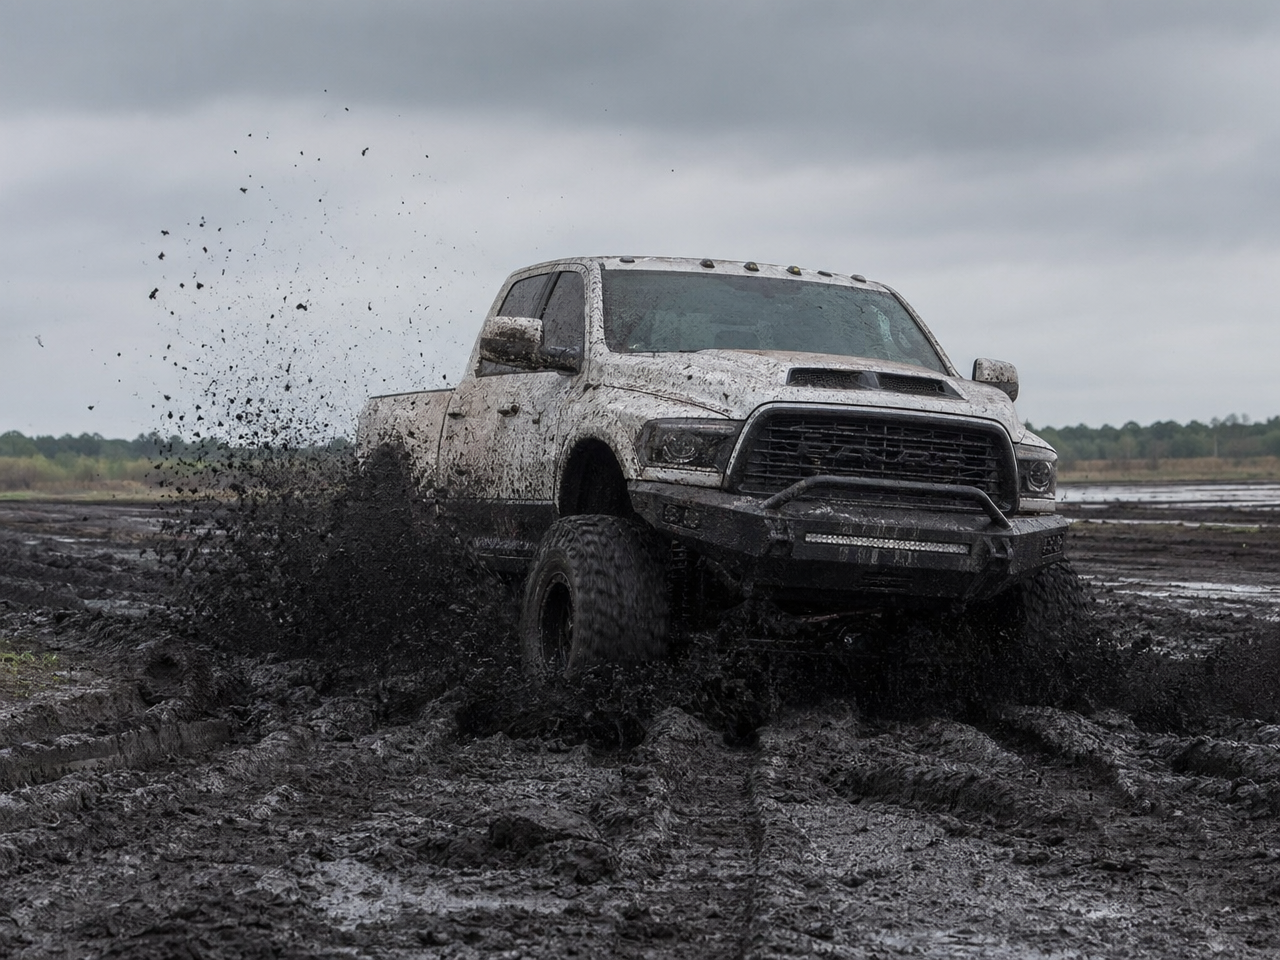
Southeast Texas Black Gumbo
Houston sits on Vertisol clay — what locals call black gumbo. This is unlike any other terrain in North America. Understanding it is the difference between a good day and a very expensive recovery.
Dry Black Gumbo
Hard, cracked, and abrasive. Creates ruts that are essentially concrete channels. Do not attempt technical trails during a prolonged dry spell — the hardened ruts will destroy sidewalls and suspension components on anything that drops into them wrong.
Wet Black Gumbo
Transforms almost instantly from trafficable surface to frictionless slick. The clay swells when it absorbs water and creates a suction effect that is unlike anything else in off-road terrain. This suction pulls the vehicle into the rut and resists extraction in ways that multiply apparent vehicle weight.
Tire Selection in Gumbo
All-terrain tires clog immediately in wet gumbo — the voids between lugs fill with clay and the tire becomes a smooth drum. Aggressive mud-terrain tires with wide void patterns self-clean under rotation. This is not a marginal difference. It is the difference between moving and being stuck.
Turning in Deep Gumbo
Avoid sharp turning in deep gumbo. The combination of suction and tire resistance at a steering angle creates the maximum possible stress on axle shafts and CV joints. If you need to change direction in deep gumbo, do it gradually and under momentum rather than with a sharp turn at slow speed.
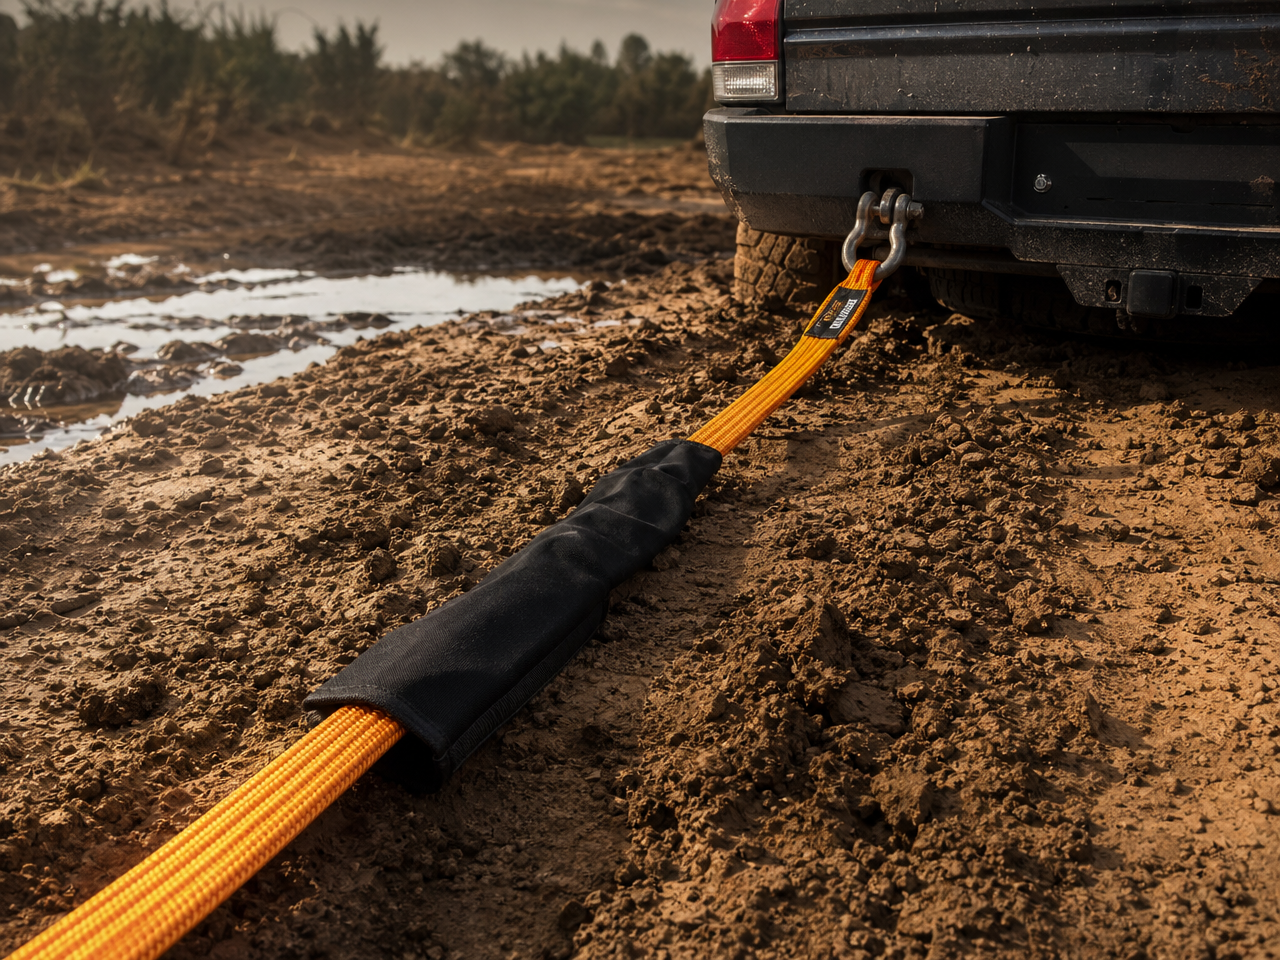
A static tow strap in Houston gumbo can snap under suction load. A kinetic recovery rope stores energy in its stretch and uses that energy to break suction in a controlled pull. This is why the gear list for Southeast Texas specifically calls for kinetic rope.
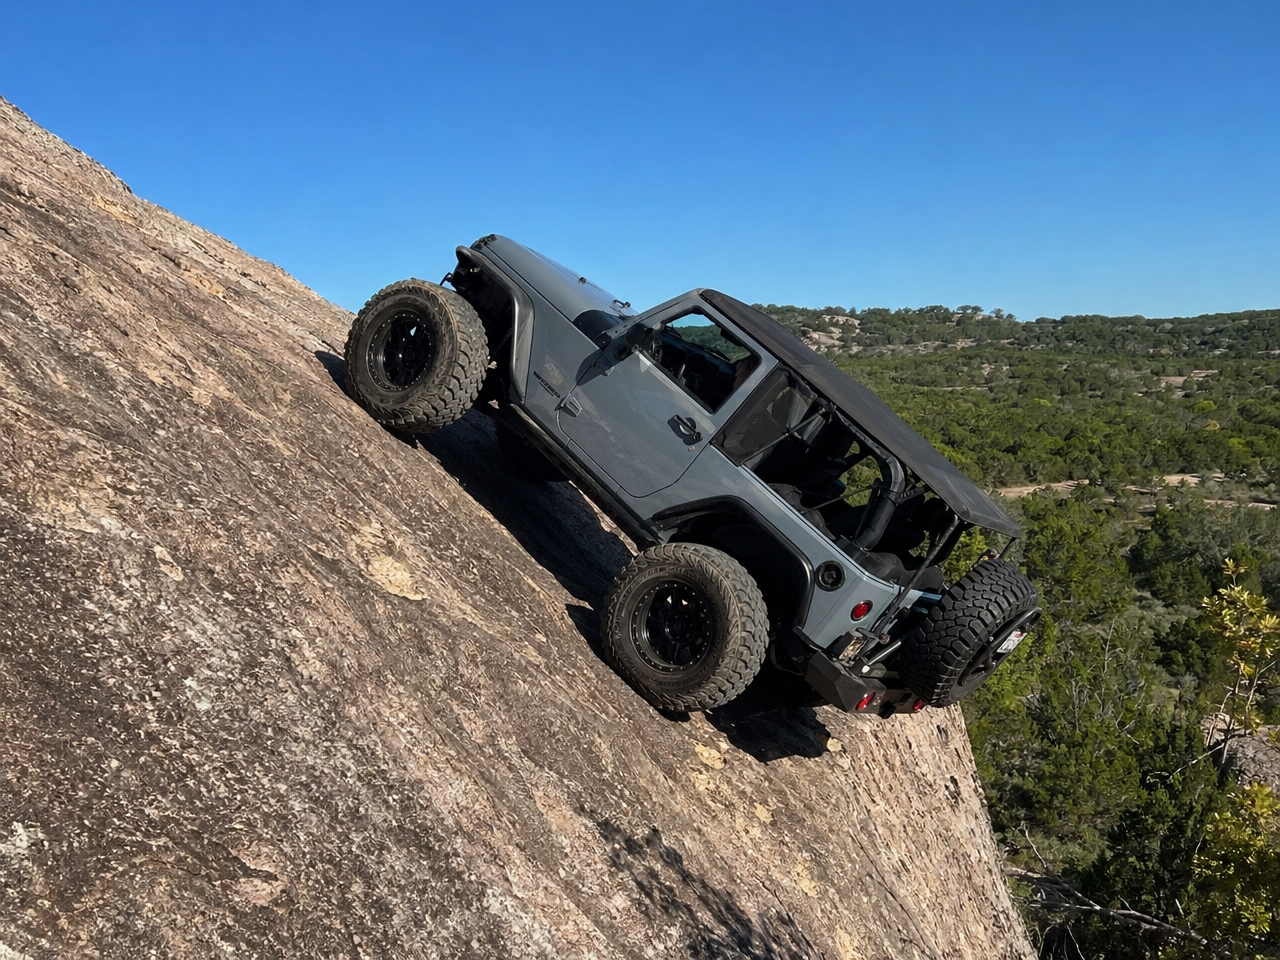
Rock Crawling — Granite and Limestone
The Hill Country and West Texas parks give Houston wheelers access to proper rock terrain within a half-day drive. Granite and limestone behave completely differently and require different technique.
Granite — Near-Unlimited Dry Traction, Zero Traction When Wet
Katemcy and similar granite venues are deceptively demanding. The rock grips like nothing else when dry — you can climb angles that look impossible because the tire-to-granite friction coefficient is extremely high. This leads new wheelers to attempt lines that exceed their rig's actual capability.
When granite gets wet it becomes one of the most dangerous surfaces in off-road driving. The same surface that gripped perfectly dry now offers essentially zero traction. Know the weather before you commit to a granite venue.
Technique on Dry Granite
Let the tires work. Slow, controlled throttle. The traction is there — you don't need to power through, you need to maintain contact. Aggressive throttle on granite spins tires unnecessarily and wastes the traction advantage the surface provides.
Pick your line for the exit, not the entrance. The beginning of a granite obstacle is usually manageable. The middle — where your approach angle is committed — is where the line choice reveals itself as right or wrong. Think two moves ahead.
Limestone — Moderate Traction, Variable Surface
East Texas and Hill Country limestone is softer and more variable than granite. It can be firm and grippy or it can crumble under tire load. Test sections by foot before committing the rig to anything that looks questionable. A surface that holds a person's weight may not hold a tire under vehicle weight and torque.
Hill Climbs
Hill climbs are where overconfidence creates the most dangerous situations in off-road driving. Getting wrong means either a rollover on the way up or a loss of control on the way down.
The Approach
Approach straight — not at an angle. A vehicle climbing a steep grade at an angle is already trending toward rollover. If your approach requires an angle, reconsider the line. Build appropriate momentum before the base of the climb — not speed, momentum. You need enough kinetic energy to maintain motion if the surface becomes inconsistent midway.
If You Lose Momentum Midway
On a firm surface with good traction: controlled increase in throttle to restore momentum. You are trying to push through a traction deficit.
On a loose or clay surface: more throttle spins tires, cleans away the surface material you were using for traction, and digs you into a hole. Back off — and if momentum is truly gone, back straight down the hill using engine braking, not your foot brake.
A turning vehicle on a hill is rotating its center of gravity away from the slope while the slope is trying to rotate it the other way. The forces combine toward rollover. If you need to change direction, complete the climb or the descent first.
The Descent
Engine braking is your primary tool coming down a steep hill, not your brakes. Select the appropriate gear before you start — usually first gear low range — and let the drivetrain's resistance control your speed. Brakes are for modulation, not primary control. Never descend with your wheels turned.
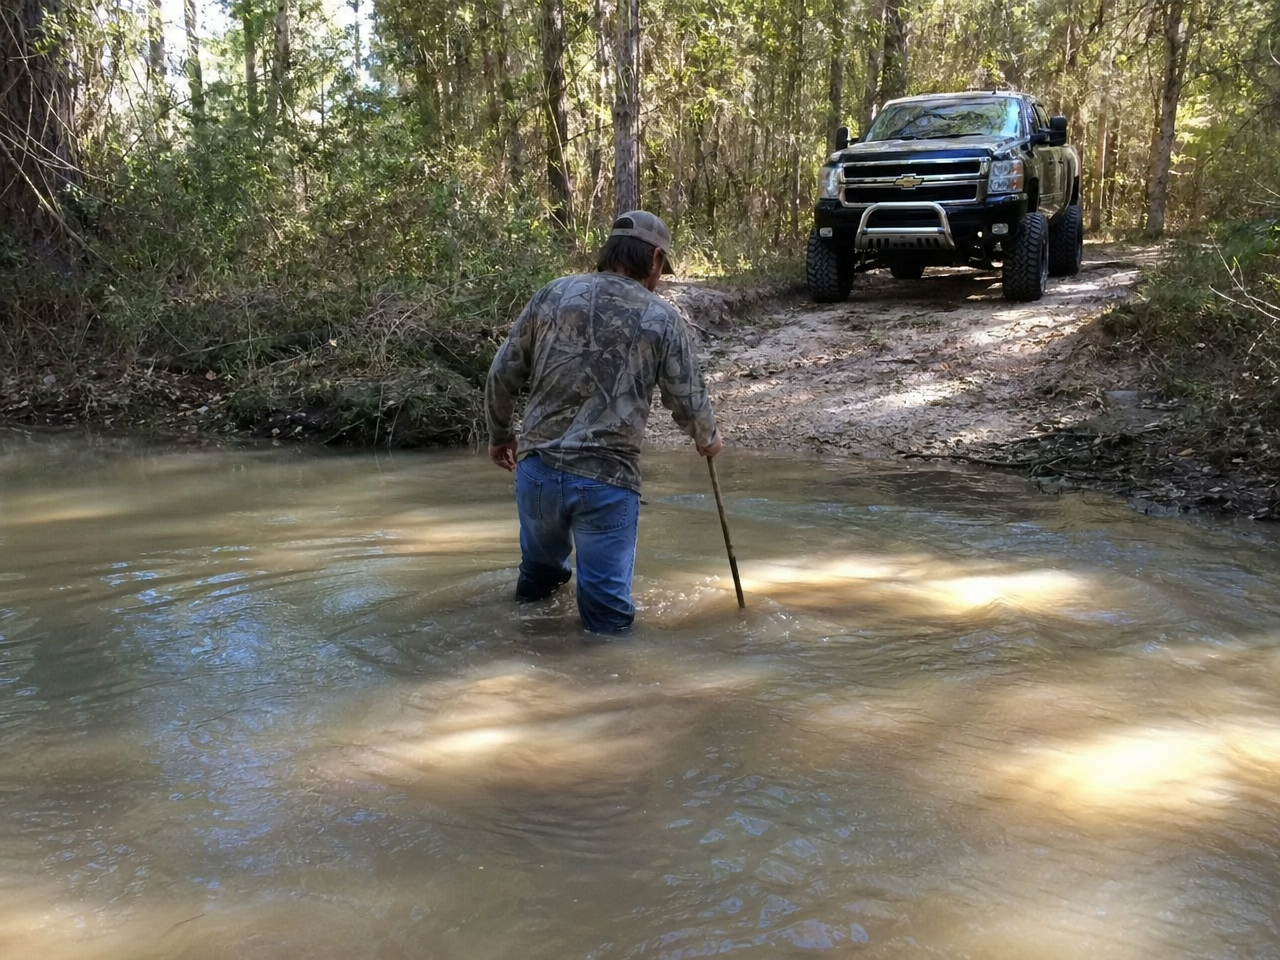
Water Crossings
Water is the obstacle that most frequently creates serious damage because drivers underestimate it consistently. Not because it is inherently the most technical — because it looks manageable from the driver's seat.
What You're Assessing on Foot
Maximum depth — especially center versus edge depth. Bottom firmness — rock, gravel, packed sand, or soft mud that will sink under vehicle weight. Current speed and direction — moving water applies approximately 500 pounds of lateral force per foot of depth per foot of vehicle width. Entry and exit angles — is the exit bank solid enough to drive out on without getting stuck immediately after the crossing.
Safe Depth Guidelines
If the water is above your knees standing in it, that crossing deserves deliberate evaluation before you drive through it.
Before Entering
Engage 4WD before entering — not in the middle of the crossing. Disconnect your front sway bar if you want maximum traction on the exit. Check your air intake location relative to anticipated water depth.
After a Water Crossing
Apply brakes gently several times while moving to dry the rotors. Check your differentials for water intrusion if you went deep — water in gear oil looks milky white. Inspect electronics within 24 hours if you submerged anything.
Local Knowledge That Isn't in Any Other Guide
Southeast Texas has terrain and weather characteristics that don't appear in generic off-road content. This is the information you need if you wheel within driving distance of Houston.
Seasonal Conditions
✓ Best Months
February through April, November through January. Clay that is moist enough to be trafficable without being the suction trap it becomes after significant rainfall.
⚠ Post-Rain Windows
Parks often close after significant rainfall to protect trail surfaces. Always check conditions before you make the drive. A park open 24 hours after heavy rain has conditions beyond what most drivers should attempt.
✕ Avoid — Summer
June through August. The clay bakes into concrete channels that destroy sidewalls and suspension. The heat creates genuine physical danger for spotters working outside the vehicle. The horsefly situation in bottomland areas is legitimately miserable.
Specific Hazards Unique to Southeast Texas
Underwater Obstacles
Houston-area waterways carry silt loads that obscure what is under the surface. A crossing that appeared clear last month may have accumulated a significant silt deposit. Walk every crossing every time regardless of prior experience with that specific crossing.
Alkaline Silt Corrosion
The silt in Houston-area waterways is alkaline and highly corrosive to electrical connections. Dielectric grease on all electrical connections before any water work is not optional. The corrosion from one deep crossing can degrade weatherproof connectors within days.
Submerged Stumps and Roots
Pine forest bottomlands have decades of root systems and fallen timber at and below the waterline. What looks like open water may have submerged obstacles that will high-center a vehicle or damage a differential housing.
Rapid Weather Changes
Gulf moisture makes Southeast Texas weather change faster than most regions. A clear morning can produce significant rainfall by early afternoon between March and October. Always have a plan to exit the trail quickly if conditions deteriorate.
When Things Don't Go As Planned
Recovery situations are not failures — they are a normal part of off-road driving. The difference between a smooth recovery and a dangerous one is preparation and correct technique.
Positioning — The Rule Nobody Skips Twice
Before any recovery begins, position every person not operating a vehicle or recovery equipment at least 1.5 times the length of the recovery strap or rope away from the line of pull. If a strap or shackle fails under load the energy release is directional and the fallout zone is along the pull line.
The force vectors if something fails can move a vehicle or a strap end faster than a person can react. This is not a guideline for beginners — it is the rule every time for every recovery.
Kinetic Recovery — The Correct Technique for Southeast Texas Mud
The kinetic recovery rope is the primary tool for mud extraction. Here is the correct sequence:
- 1
Attach kinetic rope to rated recovery points only — never to tow hooks, trailer hitches, or body-mounted tie-downs.
- 2
Lay a recovery blanket or floor mat across the rope midway — if the rope breaks the blanket absorbs the rebound and prevents the rope end from becoming a projectile.
- 3
Recovery vehicle backs up to create 3–4 feet of slack in the rope.
- 4
All bystanders clear the zone.
- 5
Recovery vehicle accelerates smoothly — not a jerk, a controlled acceleration that builds tension in the rope gradually. The rope stretches, stores energy, and transfers that energy to the stuck vehicle as the slack comes out.
Add slack and try again with more momentum. Do not increase tension by pulling tighter — increase kinetic energy by increasing vehicle speed over a longer run before the rope goes taut.
Hi-Lift Jack in Clay Terrain
The hi-lift jack is invaluable in clay terrain but it will sink before it lifts without a base plate. The jack foot concentrates all vehicle weight into a few square inches. On soft clay that foot will sink faster than the vehicle rises.
Base Plate Solutions
Commercial hi-lift base plates, a piece of ¾-inch plywood cut to approximately 12 by 12 inches, or a recovery board laid flat under the foot. Any of these distribute the load across a larger surface area and the difference is immediate and dramatic.
Never to body panels, bumper lips, or un-rated tie-down points. The vehicle's weight concentrated through a jack lift arm onto an un-rated mounting point will tear that point off the vehicle.
How the Community Operates
These standards exist for reasons that are structural, not arbitrary. Understanding why they exist makes them easier to follow and easier to explain to new wheelers in your group.
Standard Hand Signals
Establish signals and radio channels before the trail run begins. Not after the first obstacle. The spotter and driver communication system must be agreed upon before it is needed.
Uphill Has Right of Way
A vehicle on a hill climb has committed to a line and a momentum requirement. A vehicle descending has more control options. Uphill traffic has right of way. This is universal in the off-road community and exists because stopping midway up a technical climb is significantly more dangerous than pausing a descent.
Leave No Trace
Off-road access to public and private land is maintained or lost based on the behavior of the community that uses it. Trails that accumulate trash and disrespect get closed permanently. Pack out everything you pack in. If you see trash that isn't yours, pack it out anyway. The trail's continued existence is worth the inconvenience.
Never Wheel Alone
Minimum two vehicles on any technical trail. Not because you will definitely need a recovery — because when you do need one, the alternative is a potentially dangerous situation miles from cell service with no help available. This rule is stated here and it applies every time.
Communicate Before You Wheel
Establish hand signals and radio channels before the trail run begins. Not after the first obstacle. The spotter and driver communication system must be agreed upon, understood, and practiced before it is needed under stress.
Serving Drivers From Across Greater Houston
We build and service rigs for drivers from across the Houston metro — from Conroe to Galveston, Katy to Baytown. Whatever terrain you're heading toward, we'll make sure the truck is ready for it.